Did you know that nearly a quarter of adults regularly skip breakfast? Talk about starting on the wrong foot! Honestly, I used to be one of them—grabbing a stale coffee and running out the door—until I discovered the sheer magic of a Yogurt Berry Nut Bowl. It’s not just food; it’s a morning ritual that screams “self-care” without the effort. We’re talking creamy Greek yogurt, exploding fresh berries, and that satisfying, earthy crunch of walnuts. Whether you are a fitness fanatic or just someone trying to survive the morning rush, this bowl is your new best friend. Let’s dive into how you can build the ultimate breakfast bowl that keeps you full until lunch!
 1")
Choosing the Best Yogurt Base for Your Bowl
Most people just grab whatever is on sale, but for a really good bowl, I always suggest Greek yogurt. It’s much thicker than regular yogurt because they strain out the extra liquid. This is important because if your yogurt is too thin, all your heavy berries and nuts will just sink to the bottom like rocks in a pond. Plus, Greek yogurt usually has about double the protein of the regular stuff. I find that when I eat a high-protein base, I’m not looking for a snack an hour later.
If you don’t do dairy, don’t worry. I’ve experimented with coconut yogurt and almond milk yogurt too. Coconut yogurt is super creamy and tastes like a treat, but it doesn’t have much protein. If you go that route, you might want to add extra nuts later to stay full.
One big tip from my kitchen: buy the plain version. I know, it sounds boring. But the flavored ones are usually loaded with sugar. I like to control the sweetness myself with a little honey or just let the fruit do the work. If it’s too tart for you, just stir in a tiny drop of vanilla extract. It makes it taste like dessert without the sugar crash.
When you’re at the store, look for “live and active cultures” on the label. That’s just a fancy way of saying it has probiotics which are great for your gut. Just plopping a big dollop into a bowl is the first step to a great morning.
 2")
Selecting the Freshest Berries and Fruits
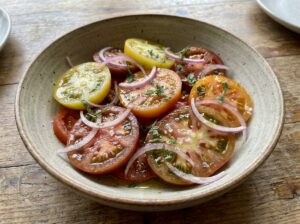
Selecting the right fruit is where the magic really happens. When I’m making a Yogurt Berry Nut Bowl, I usually lean toward blueberries, strawberries, or raspberries. If you can get them fresh from a farmer’s market, do it! They taste way sweeter than the ones that have been sitting in a plastic carton at the grocery store for a week.
One thing I’ve learned the hard way: always wash your berries, but don’t do it until right before you’re ready to eat. If you wash a whole container of raspberries and put them back in the fridge, they turn into mush by the next morning. It’s a sad sight. I like to give them a quick rinse in cold water and pat them dry with a paper towel so the water doesn’t make my yogurt all runny.
Blueberries are probably my favorite because they have those antioxidants called anthocyanins—that’s just a big word for the stuff that makes them healthy. Plus, they “pop” in your mouth. If strawberries are huge, I’ll slice them up into little hearts or rounds so I get a bit of berry in every single spoonful.
Can you use frozen berries? Sure, I do it in the winter. Just let them thaw in a little dish first. They’ll release a lot of purple or red juice, which actually looks really cool when you swirl it into the white yogurt. It’s like a little science experiment in your breakfast bowl. Whatever you pick, try to get a mix of colors. It makes the bowl look better, and different colors usually mean you’re getting different vitamins.
 3")
The Crunch Factor: Nuts, Seeds, and Granola
Now, we have to talk about the crunch. A Yogurt Berry Nut Bowl without something crunchy is just… mushy. And nobody likes a bowl of mush. I’m a big fan of walnuts because they have that earthy taste that goes so well with sweet berries, but I also keep a jar of almonds and pecans in my pantry for variety.
Here is a trick I learned: if you have five extra minutes, toss your nuts in a dry pan on the stove for a bit. Don’t add oil or anything. Just heat them until they start to smell really good. This releases the oils and makes them way crunchier. It’s a total game-changer. Just make sure you don’t burn them; they go from “perfect” to “black” really fast!
I also like to sprinkle in some “superfood” seeds. I usually grab chia seeds or hemp hearts. They don’t have a huge flavor, but they add a nice little texture and are packed with healthy fats like Omega-3s. If you want that classic crunch, you can add a bit of granola, too. Just be careful with the bag from the store because some of them have more sugar than a candy bar. I try to use it like a garnish—just a little sprinkle on top rather than filling half the bowl with it.
The goal is to get a bit of “snap” in every bite to balance out that creamy yogurt. It makes the whole meal feel more substantial, like you’re actually eating a real lunch instead of just a snack.
 4")
Sweeteners and Flavor Boosters
Once you have your base, your fruit, and your crunch, it’s time to talk about the “flavor boosters.” This is where you can really make the bowl your own. Even though I usually start with plain yogurt, I’m a sucker for a little drizzle of something sweet. Raw honey is my go-to—it has that rich, floral taste that maple syrup just can’t match. If you’re vegan, agave nectar works great too because it dissolves really easily into the cold yogurt.
But sweetness isn’t the only way to add flavor. I almost always shake a little cinnamon over the top. It smells amazing and it actually helps keep your blood sugar steady, which is a nice bonus. Sometimes, if I’m feeling fancy, I’ll stir in a tiny drop of vanilla extract or even some lemon zest. That little bit of citrus really wakes up the berries and makes everything taste a lot brighter.
Another thing I love doing is adding a “swirl” of nut butter. A big spoonful of almond butter or peanut butter mixed in makes the whole thing feel much more decadent. It adds a bit of creaminess that almost makes it feel like you’re eating dessert for breakfast. Just try not to go overboard—a little bit goes a long way. The goal here is to enhance the flavors of the berries and the yogurt, not drown them out!
 5")
Step-by-Step Assembly for the Perfect Aesthetic
Now, I know it all goes to the same place, but there is something about a pretty bowl that just makes breakfast taste better. Plus, if you assemble it the right way, you get a bit of every texture in every spoonful. I usually start by smoothing out the yogurt in the bottom of the bowl with the back of a spoon to create a nice flat surface.
Instead of just dumping everything in a pile, I like to arrange my toppings in little rows or sections. I’ll put a line of blueberries down the left, a row of sliced strawberries next to them, and then a little mountain of walnuts on the side. If you’re using seeds or granola, sprinkle those right down the middle. It looks like those fancy bowls you see on social media, but it only takes about thirty seconds extra to do.
If you are a busy person—and let’s be honest, who isn’t?—you can actually meal prep most of this. I’ll portion out my yogurt into glass jars on Sunday night. But here is the secret: keep the nuts and granola in a separate little baggy or container. If you put them on the yogurt overnight, they get soft and lose all that great crunch.
When you’re ready to eat, just pour your toppings on, give it a little swirl if you like, and you’re good to go. It’s a fast, healthy way to feel like you’ve actually got your life together before 8:00 AM!
 6")
In short, whipping up a Yogurt Berry Nut Bowl is the easiest way to fuel your body without sacrificing flavor or time. It is creamy, crunchy, customizable, and honestly, just plain delicious. I’ve found that having this for breakfast keeps my energy levels steady and stops me from reaching for those sugary office snacks halfway through the morning.
Don’t be afraid to experiment with different nut butters, seasonal fruits, or even a dash of different spices to keep things exciting! There are no real rules here—just make it something you actually look forward to eating. If you found this guide helpful and are ready to upgrade your mornings, please share this recipe on Pinterest so others can find it too, and tag us in your creations!