Do you know that nearly 40% of home cooks accidentally steam their vegetables instead of roasting them because of one simple mistake? It drives me crazy! I used to be one of them, pulling out a tray of sad, limp zucchini. But listen, once you master the art of the roast, you will never go back. We are talking about golden, caramelized edges and tender centers that make you actually want to eat your greens! In this post, I’m going to show you exactly how to achieve that perfect crunch using high-quality olive oil and the right technique. Let’s get cooking!
 1")
Selecting the Best Vegetables for Roasting
I have to admit something embarrassing. When I first started cooking, I thought I was being so smart by throwing every single vegetable I had in the fridge onto one big sheet pan. I’m talking chunks of raw potato right next to delicate asparagus spears. I tossed them in oil, shoved them in the oven, and walked away.
Big mistake. Huge.
Twenty minutes later, I opened the door to a tragedy. The asparagus was burnt to a crisp—like, inedible charcoal sticks—while the potatoes were still rock hard in the middle. I was so frustrated I think I actually cried a little. But hey, we live and we learn, right? Through a lot of trial and error (and many burnt dinners), I figured out that selecting and pairing the right vegetables for roasting is half the battle.
The Great Divide: Root vs. Cruciferous
You gotta understand that not all veggies are created equal. Root vegetables like carrots, potatoes, and parsnips are dense. They are stubborn. They take their sweet time to soften up. On the other hand, cruciferous veggies like broccoli and cauliflower, or softer stuff like zucchini and bell peppers, cook way faster.
If you want a mix, you have two options. You can either roast them on separate pans (my preferred method because I like control), or you can stagger the timing. Put those hard root veggies in for about 15-20 minutes first, then toss in the softer guys later. It sounds like extra work, but it’s worth it to avoid the “burnt and raw” combo.
Size Actually Matters
Here is a tip that changed my life: cut everything the same size. Seriously. If you have a giant chunk of sweet potato next to a tiny sliver, the tiny one is gonna burn before the big one is even warm.
I try to aim for 1-inch cubes for most things. It doesn’t have to be perfect—I definitely don’t get a ruler out or anything crazy like that. But keeping them roughly uniform helps them cook evenly. If I’m doing carrots, I might slice them on a diagonal just to be fancy, but I keep the thickness the same.
The Water Enemy
Okay, listen closely because this is where 90% of people mess up. Moisture is the enemy of crispiness.
If you wash your fresh produce and throw it straight into the bowl with oil while it’s still dripping wet, you are doomed. The water creates steam in the oven. Instead of roasting, your veggies are just steaming in their own juices. The result? Mushy, sad vegetables that no one wants to eat.
I learned this the hard way with green beans. Now, I wash my veggies and then I pat them dry with a paper towel. Like, really dry. Sometimes I even let them air dry on the counter for a bit if I have time. You want that oil to coat the vegetable skin directly, not float on top of a layer of water.
Seasonal Picks
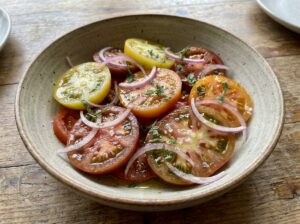
While you can roast almost anything, sticking to what’s in season usually gives better flavor. In the fall, I am obsessed with butternut squash and Brussels sprouts. The natural sugars in the squash caramelize so well. In the summer, cherry tomatoes and zucchini are my go-to. Just remember that zucchini has a ton of water, so high heat is crucial there.
Picking the right vegetables for roasting isn’t rocket science, but it does require a little bit of strategy. Don’t be like the old me and mix your potatoes with your asparagus! Take a second to plan your pan, and your tastebuds will thank you.
 2")
Why Extra Virgin Olive Oil is the Gold Standard
I used to have this massive argument with my neighbor, Karen. She swore up and down that if you put extra virgin olive oil in the oven, it would turn into poison. She had me terrified! For years, I used flavorless canola oil because I was scared of “burning” the good stuff.
Turns out, Karen was wrong (don’t tell her I said that).
The Smoke Point Myth
There is a huge myth floating around that olive oil can’t handle heat. I believed it for the longest time. But the truth is, high-quality extra virgin olive oil actually has a smoke point of around 375°F to 410°F (that’s roughly 190°C to 210°C).
Since I usually roast my veggies right around 400°F, it is perfectly safe. I’ve roasted hundreds of pans of broccoli and potatoes at that temp. Never once has my kitchen filled with smoke. If your oil is smoking instantly, it might be old or low quality. Good oil holds up just fine.
Flavor That Actually Tastes Like Something
Here is the thing about vegetable oil or canola oil: it tastes like nothing. It’s just… slippery. It does the job, sure, but it’s boring.
But olive oil? It brings this grassy, peppery goodness to the party. When I roast carrots, that slight bitterness from the oil balances out the sugar in the carrots perfectly. It is a total game changer. You want your food to taste like it came from a restaurant, right? The chefs aren’t using corn oil for this, I promise you.
Keeping the Good Stuff
I’m not a doctor, but I read a lot about food science because I want to know what I’m eating. One of the coolest things about cooking with olive oil is that the healthy stuff—the polyphenols and antioxidants—is actually pretty stable.
Even after roasting, a lot of those nutrients stick around. So, you aren’t just making your roasted vegetables tasty; you’re keeping them nutritious. It feels good to serve my family something that I know is loaded with healthy fats instead of cheap processed oils.
The Glug-Glug Rule
How much should you use? This is where I used to mess up big time. I used to be so stingy with oil because I was counting calories. I’d use a tiny teaspoon for a whole tray.
My veggies came out dry, shriveled, and sad. Then I swung the other way and practically deep-fried them. Also bad. Greasy veggies are gross.
You need to find the middle ground. My rule of thumb is the “Glossy Coat.” Drizzle enough oil so that every single piece of vegetable looks shiny, but there isn’t a pool of oil at the bottom of the bowl. Usually, about two tablespoons for a standard sheet pan does the trick. You want them slick, not swimming.
 3")
Master the Temperature: High Heat Roasting Techniques
I have a confession to make. For the longest time, I was a “350 degrees for everything” kind of cook. Cookies? 350. Chicken? 350. Vegetables? You guessed it, 350. I treated my oven dial like it was glued to that one spot.
And honestly? My vegetables were boring. They were soft, sure, but they looked pale and tasted kind of like cafeteria food. It wasn’t until I accidentally cranked the knob too high one night that I discovered the magic of high heat roasting. I pulled out a tray of broccoli that looked borderline burnt, but when I tasted it? Oh man. It was sweet, nutty, and had this amazing crunch.
Finding the Sweet Spot
If you want those crispy, brown edges—we call that caramelization in the food world—you have to be brave with the heat. 350°F (175°C) just isn’t gonna cut it. That temp is great for baking cakes, but it’s too gentle for veggies.
My absolute favorite temperature range is 400°F to 425°F (that’s about 200°C to 220°C). At this heat, the water inside the vegetable evaporates quickly, allowing the sugars on the outside to brown before the inside turns to mush. It’s a race against time, and high heat helps you win.
If I’m roasting something dense like sweet potatoes or carrots, I usually stick to 400°F so they have time to cook through without burning. But for quick stuff like asparagus or green beans? I crank it to 425°F. It’s fast and furious, but the results are totally worth it.
Location, Location, Location
Where you put the rack matters way more than people think. I used to just shove the pan wherever it fit. Bad idea.
If you put the pan on the very top rack, the veggies might burn on top before they are cooked. If you put it on the very bottom, the bottoms turn black while the tops are still pale. The middle rack is usually the safest bet for even air circulation.
However, here is a little cheat code I use. If my potatoes are cooked but look a little pale, I’ll move the pan to the bottom rack for the last 5 minutes. It gives the bottom of the veggies a direct hit of heat from the heating element. Just set a timer, or you will regret it. I’ve burned many a batch by walking away to check my phone!
The Convection Confusion
Does your oven have a fan setting? That’s called a convection oven. It blows hot air around to cook things faster. It’s awesome, but it can be tricky.
If you use the fan, you need to either lower the temperature by about 25 degrees or check your food earlier. The moving air strips away moisture faster. I love using convection for roasted potatoes because it makes them super crispy, but you gotta keep an eye on them. They go from “perfect” to “charcoal” pretty fast.
The Hot Pan Trick
Here is a pro tip I learned from a TV show years ago. Stick your empty roasting pan in the oven while it preheats.
When you carefully take that hot pan out and toss your veggies on it, you’ll hear a sizzle. Ssssss! That sound is music to my ears. It starts cooking the vegetables immediately, giving you a head start on that sear. It’s a small extra step, but it makes a noticeable difference in the final texture.
 4")
The Secret to Crispiness: Don’t Overcrowd the Pan
I am about to save you from the biggest kitchen heartbreak of all time. We have all been there. It’s Tuesday night, you are tired, and you just want to get dinner done. You look at that pile of chopped veggies and think, “I can definitely fit all of this on one pan.”
So you stack them. You shove them into corners. You make a vegetable mountain.
Do not do this! I repeat, do not do this. I used to be the Queen of Overcrowding because I hated washing dishes. But every single time, I ended up with a tray of soggy, steamed mush instead of crispy roasted vegetables. It was tragic. I basically boiled them in the oven.
The Single Layer Rule
Vegetables are like teenagers; they need their personal space. When veggies cook, they release water. It’s just science. If they are piled on top of each other, that steam has nowhere to go. It gets trapped between the layers and turns your healthy side dish into a soft mess.
You need air circulation. The hot oven air needs to be able to zoom around every single piece of broccoli or potato. My rule is that no two vegetables should be touching. If they are cuddling, separate them. If you can see the bottom of the baking sheet between the pieces, you are doing it right.
Two Pans Are Better Than One
I know, I know. Washing two pans sucks. I hate it too. But if you are cooking for a family, one standard sheet pan is rarely enough.
I finally gave in and started splitting my batches between two pans. It made a massive difference. Suddenly, my cauliflower had those crispy brown edges I see in magazines. My sweet potatoes were actually firm, not floppy.
If you crowd the pan, you are basically steaming your food. If you spread them out, you are roasting them. It is that simple. Just wash the extra pan; your tastebuds will thank you later.
The Midway Flip
Do you just stick the pan in and walk away until the timer beeps? I used to do that. It’s the lazy way, and I am all about lazy cooking sometimes. But for the best sheet pan dinner, you gotta interact with your food a little.
Halfway through the cooking time, I open the oven and give everything a toss. I just use a spatula and flip things around. This helps them brown evenly on all sides.
If you don’t flip, one side gets super dark (maybe even burnt) while the other side stays pale. We want gold all over, not just on the bottom. It only takes ten seconds, so just do it.
Parchment vs. Foil vs. Naked
People ask me this all the time: what should I line the pan with? Honestly, it depends on how much you hate scrubbing.
I usually use parchment paper because nothing sticks to it. Literally nothing. It makes cleanup a breeze. However, I have noticed that vegetables don’t get quite as crispy on parchment as they do directly on the metal metal.
If I really want that deep, dark crunch—like for potatoes—I use aluminum foil or just the bare metal pan (greased well, obviously). The metal conducts heat better than paper. But be warned: you might have to scrub that pan a bit harder later. It’s a tradeoff I’m willing to make for a perfect crunch.
 5")
Seasoning Variations to Elevate Your Dish
I grew up in a house where “seasoning” meant a quick shake of table salt and maybe some pepper if we were feeling wild. Don’t get me wrong, my mom was a great cook, but our vegetables were usually pretty plain. For years, I thought that was just how they were supposed to taste.
When I started cooking for myself, I realized that vegetable seasoning is actually where the magic happens. I remember making roasted cauliflower with just olive oil and salt, and it was okay. Then, the next week, I added curry powder and a squeeze of lime. It blew my mind. It was like eating a completely different food.
The Basics Are Non-Negotiable
Before we get fancy, we have to talk about salt. If you are using that super fine table salt from the blue canister, stop it. It’s really easy to over-salt your food with that stuff because the grains are so small.
I switched to kosher salt or coarse sea salt years ago, and I haven’t looked back. The larger flakes give you way more control. Plus, getting a little crunch of salt on a piece of roasted broccoli is just delightful. And don’t be shy with the black pepper. Freshly cracked is best; pre-ground pepper tastes like dust to me.
Herb Timing is Everything
This is a mistake I made constantly. I would chop up fresh parsley or basil and toss it in with the raw veggies before roasting. Twenty minutes later, I’d pull out the pan and find black, burnt confetti all over my dinner.
Here is the rule I live by now: woody herbs go in before, soft herbs go in after. Woody herbs are things like rosemary, thyme, and oregano. They are tough and can handle the high heat of the oven without turning into ash. In fact, roasting them releases their oils and makes the whole kitchen smell amazing.
Soft herbs like parsley, cilantro, basil, or dill? Save those for the very end. Sprinkle them on the fresh hot veggies right before you serve them. It keeps the flavor bright and fresh.
The Acid Kick
If you take a bite of your roasted vegetables and think, “This is good, but it’s missing something,” it’s probably acid. Rich olive oil and caramelized veggies are heavy flavors. They need something sharp to cut through that richness.
I almost always finish my tray with a squeeze of fresh lemon juice. Just a little bit. It wakes up all the flavors. If I’m doing something sweeter, like sweet potatoes or Brussels sprouts, I love using a drizzle of balsamic glaze. It adds this tangy, sticky sweetness that is addictive. Seriously, my kids will eat anything if it has balsamic on it.
Spice It Up (Carefully)
Using dried spices is an easy way to change the vibe of your dinner. Cumin and paprika give a smoky, taco-night feel. Garlic powder and onion powder are classics for a savory kick.
But I have to warn you about fresh garlic. I love garlic more than anyone, but it burns really fast at 400 degrees. If you mince fresh garlic and roast it for 30 minutes, it will turn bitter and acrid.
If I want that fresh garlic flavor, I usually toss the veggies with minced garlic during the last 2-3 minutes of cooking. Or, I just use garlic powder, which handles the heat much better. It saves me from picking burnt bits out of my teeth later!
 6")
Look, I know cooking after a long day feels like a chore sometimes. I have been there, staring at a bag of carrots and wishing they would just cook themselves. But mastering these olive oil roasted vegetables has honestly saved my weeknight dinners more times than I can count. It turns “eating your greens” from a punishment into something you actually look forward to.
You don’t need fancy equipment or a culinary degree. Just remember the golden rules we talked about: crank up that heat, don’t crowd the pan (seriously, give them space!), and use enough good extra virgin olive oil. Once you get that perfect caramelized vegetable crunch, you will never want to steam a piece of broccoli again.
I really hope these tips help you feel a little more confident in the kitchen. If you try this method and finally get that crispy texture, I would love to hear about it! And hey, if you found this helpful, do me a huge favor and pin this to your Healthy Recipes board on Pinterest. It helps other home cooks find us and stop the tragedy of soggy vegetables!